How to Choose the Right Pump Seal Kit for Your Pump?
Choosing the right Pump Seal Kits is a practical reliability decision, not a parts-counter guess. A seal that looks correct may still fail if its dimensions, materials, or design do not match the pump’s operating conditions. A small mismatch can mean leakage, downtime, and another teardown.
“Match the seal to the pump’s duty, not just its model number,” says Alex Morgan, a fictional pump-maintenance specialist quoted here to express this guide’s central principle. This is an original illustrative quote, not a verified statement from a real industry expert. For a real replacement, check the pump nameplate and service manual, then confirm the seal arrangement, shaft size, elastomer compatibility, temperature range, pressure, and fluid. A clear photo of the old seal can help, but it cannot confirm every specification.
Details matter. A pump handling hot wash water may need different seal materials from one moving abrasive slurry. Even a familiar pump can have revisions or aftermarket parts. Take time to verify. Guesswork gets expensive.
This guide’s outline will explain how to identify your pump, compare seal-kit components, assess materials and operating limits, and check fit before installation. It will also cover common selection mistakes and when to consult the pump manufacturer or a qualified technician. The aim is simple: help you choose a compatible kit with evidence, not assumptions. One caveat remains: worn parts can hide the original design, so verify before ordering.
Classify the Pump Duty Using API 682 Categories 1, 2, and 3
How to Choose the Right Pump Seal Kit for Your Pump?
Classify the Pump Duty Using API 682 Categories 1, 2, and 3
Choosing a seal kit starts with understanding the service, not just matching dimensions. API 682 categories help frame the duty and the level of design and qualification needed. Category 1 generally suits less demanding services, where operating conditions are comparatively moderate. Category 2 is intended for more demanding applications, while Category 3 addresses severe service conditions. Exact requirements depend on the applicable API 682 edition and the pump arrangement.
Check the details that define the duty: fluid composition, temperature, pressure, speed, and the presence of solids or corrosive components. A hot hydrocarbon service with frequent cycling may need a different arrangement from a cool, clean liquid at steady pressure. Small differences matter. In practice, the category boundary is not always tidy, and selecting by category alone can miss important risks. Review the pump data sheet and seal specification, then confirm the proposed kit’s materials, faces, elastomers, and support plan with a qualified engineer. Keep operating records nearby; a temperature spike or repeated leakage can reveal what the original duty description overlooked.
Record Operating Pressure, Temperature, Speed, and Fluid Conditions
How to Choose the Right Pump Seal Kit for Your Pump?
Record Operating Pressure, Temperature, Speed, and Fluid Conditions
A seal kit should match the pump’s real operating conditions, not just its model number. Record suction and discharge pressure, normal and peak temperature, shaft speed, and fluid composition. Note solids, viscosity, and whether the fluid can crystallize or dry on the seal faces. Small details matter. A short temperature spike during startup may change material needs.
The U.S. Department of Energy’s Improving Pumping System Performance sourcebook reports that pumping systems account for nearly 20% of global electricity demand. That figure describes pumps, not seal failures, but it shows why operating efficiency deserves attention. A poor seal choice can contribute to leakage, downtime, and repeated maintenance. Compare your readings with the pump and seal-kit limits, and check whether the data came from steady operation or a brief upset. One log sheet may miss a cycle. I’ve seen that overlooked.
Tips: Keep a simple operating log beside the pump. Record readings at startup, steady load, and shutdown. Include the date, fluid temperature, and any unusual vibration or leakage. Share the log with a qualified seal specialist before selecting materials or a seal arrangement. The readings may be imperfect; note that rather than guessing.
How to Choose the Right Pump Seal Kit for Your Pump? - Record Operating Pressure, Temperature, Speed, and Fluid Conditions
Use this worksheet to capture actual service conditions before selecting a seal kit. Example conditions are illustrative; confirm pressure, temperature, speed, materials, and seal limits against the pump and seal manufacturer’s specifications.
| Service / Example |
Operating Pressure
(record differential) |
Temperature |
Shaft Speed |
Fluid Conditions |
Seal Kit Factors to Check |
| Clean water transfer |
2–6 bar (29–87 psi) |
10–40°C (50–104°F) |
1,450–2,900 rpm |
Low-viscosity, clean, non-abrasive water |
Confirm elastomer compatibility and face materials; verify seal dimensions and the pump’s rated pressure and speed. |
| Warm process water |
3–8 bar (44–116 psi) |
60–90°C (140–194°F) |
1,450–2,900 rpm |
Water; may contain treatment chemicals or dissolved minerals |
Check elastomer temperature and chemical limits, face pairing, and whether the seal requires a flush or cooling arrangement. |
| Light hydrocarbon service |
4–12 bar (58–174 psi) |
20–80°C (68–176°F) |
1,450–3,600 rpm |
Low-viscosity liquid; may have low lubricity or volatility |
Verify chemical compatibility, vapor-pressure and operating-temperature conditions, and the seal arrangement required for the process hazard assessment. |
| Abrasive slurry |
2–10 bar (29–145 psi) |
15–60°C (59–140°F) |
700–1,800 rpm |
Suspended solids; record particle size, concentration, and abrasiveness |
Assess hard face materials, solids-handling design, flushing or barrier-fluid needs, and shaft-sleeve condition. |
| Chemical solution |
1–8 bar (15–116 psi) |
15–70°C (59–158°F) |
1,450–2,900 rpm |
Record exact chemical, concentration, pH, and any contaminants |
Check every wetted material against a chemical-compatibility reference; do not select elastomers based on fluid name alone. |
| User’s operating record |
Normal: ______ bar
Maximum: ______ bar |
Normal: ______ °C
Maximum: ______ °C |
Normal: ______ rpm
Maximum: ______ rpm |
Fluid: __________
Solids / concentration: __________ |
Also record start-up and upset conditions, lubrication, flush plan, leakage requirements, seal size, and pump model. |
Selection reminder: pressure and temperature limits depend on the specific seal design, materials, installation, and operating conditions. Treat the highest credible operating values—not just normal readings—as part of the selection review.
Match Seal Faces and Elastomers to the Pumped Fluid
How to Choose the Right Pump Seal Kit for Your Pump?
Match Seal Faces and Elastomers to the Pumped Fluid
Choosing a seal kit starts with the fluid, not just the pump model. Check its chemistry, temperature, abrasiveness, and operating pressure. A seal that works with clean water may swell, crack, or wear quickly in oil or a chemical solution. For abrasive fluids, harder seal faces can resist wear, but the best pairing depends on the pump’s speed and operating conditions. Consult the pump manual and verify material compatibility with a qualified supplier. Small details matter.
Elastomers need equal care. EPDM, for example, suits some water-based applications but may be unsuitable for oils. Other elastomers handle oils better, yet can struggle with heat or certain chemicals. Confirm the fluid’s actual composition, including cleaning agents or additives. Guessing from its appearance is risky.
Tips: Review the fluid safety data and operating temperature before ordering. Check whether the kit includes the right O-rings, springs, and seal faces. If the pump handles changing fluids, tell the supplier; a standard kit may not cover every condition. Keep a record of seal life and leakage. It may reveal a mismatch, though one failed seal does not prove the material was wrong.
Verify Seal Dimensions Against OEM Drawings and API 682
Choosing a pump seal kit starts with the drawing, not the old seal sitting on a bench. Confirm the pump model and drawing revision, then compare the seal’s shaft or sleeve diameter, chamber bore, gland dimensions, and working length. Check bolt-hole spacing and flush-port locations too. A few millimeters can prevent proper fit or leave the seal faces incorrectly positioned. Measure the existing parts, but treat worn or corroded surfaces cautiously; their dimensions may no longer match the original design.
Check the specified seal arrangement and operating conditions against the applicable API 682 requirements. The standard helps define seal configurations and related design expectations, but it does not replace the pump’s OEM dimensional drawing. Verify details such as the setting length and interfaces, and confirm the relevant standard edition with your engineering team. Small details matter. If a drawing conflicts with a measurement, stop and resolve the mismatch before ordering. That extra check can feel slow, and drawings are not always perfectly clear, but guessing is worse. Record the dimensions, tolerances, revision, and any uncertainty so the supplier can review the same information.
Check Kit Components and Installation Limits Against Manufacturer Data
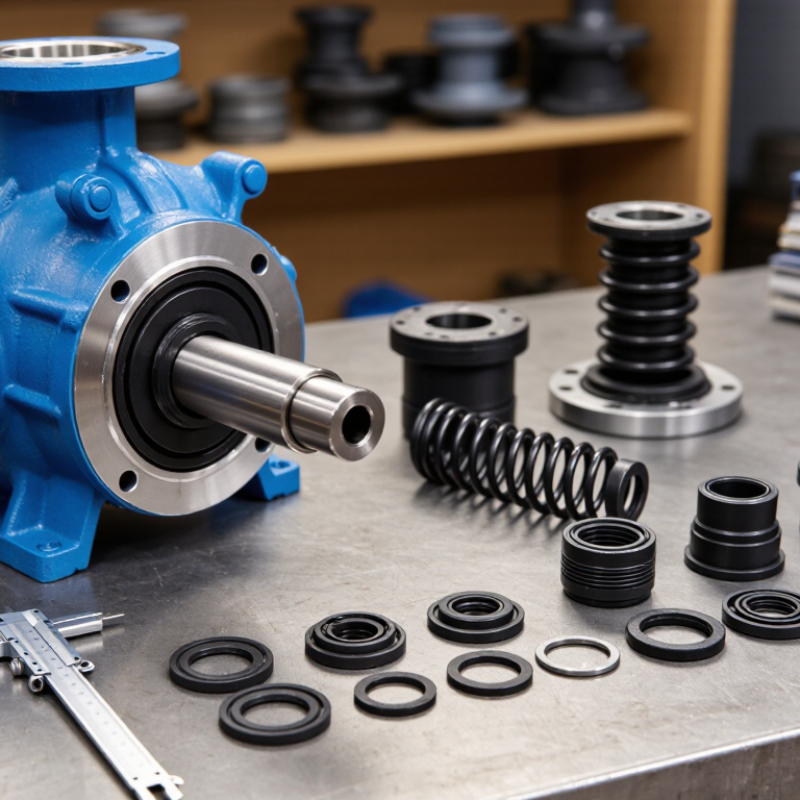
Choosing a pump seal kit starts with the pump’s exact model and service conditions. Check the manufacturer’s parts list, drawings, and maintenance notes before ordering. Compare seal dimensions, material types, spring arrangement, and included O-rings. A kit may look correct but still contain a different seat or shaft seal. Small differences matter.
Read the installation limits in the manufacturer’s data. Confirm allowable shaft speed, pressure, temperature, and fluid compatibility. For example, a seal exposed to hot water may need different elastomer materials than one handling a cool, clean liquid. Check shaft and sleeve measurements for wear, too. A new seal cannot reliably correct a scratched sleeve. I have seen part descriptions leave room for doubt; verify uncertain details with a qualified service technician.
Tips: Lay out the kit beside the parts diagram. Keep components clean, and avoid touching sealing faces with greasy fingers. Follow the specified fitting direction and tightening values. If a limit is unclear, pause and check the service documentation. Guessing is tempting, but risky.